
Horseback Riding
Jumping
From: Equestrian and Horse | Horseback Riding
See also: Mounting | Position | Lunging | Flatwork
Dismounting
Jumping
To successfully jump a horse, the seven stages need to be ridden accurately. With the rider remaining in balance and able to help the horse both before during and after the jump.
The 7 stages to jumping:
- 1. Turn.
- 2. Approach.
- 3. Take off.
- 4. Jump.
- 5. Landing.
- 6. Get away.
- 7. Turn.
1) The Turn
The turn to the jump needs to be ridden accurately so that it lines you up with the centre of the jump being straight ahead. The rider needs to be sitting up and looking ahead to the jump that they are going to do, with the horse being ridden from the riders leg up into the hand, to keep the horse in a balanced rhythm which has plenty of impulsion.
2) Approach
The approach needs to lead you directly to the centre of the jump which you are planning to jump. The rider needs to be sitting up, looking ahead and channeling the horse forward, between their hand and their legs enabling the rider to maintain a straight line, with the horse maintaining the impulsion and balance that is required.
3) Take Off
This is the point at which the horse begins to gather his hindlegs underneath his body and starts to lift up the forehand. The rider needs to keep their lower leg securely wrapped around, to maintain the horses energy and forward momentum.The riders hands need to follow the movement of the horses head and neck and still maintain a contact through the rein to the bit. At the point of takeoff the rider should still be looking ahead, up and over the jump.
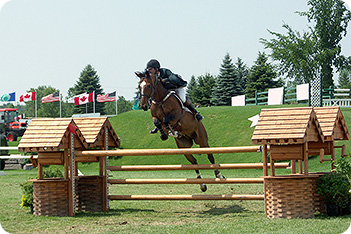
4) Jump
This is the point at which the horse will bascule in the air,the forehand is well lifted, and the back well rounded, with their forelegs tucked up in the front and the hind legs tucked up at the back allowing the horse to clear the jump. When the horse is in the air the the rider folds into the jumping position. To achieve a good fold the riders upper body is lowered, with the seat being slipped to the back of the saddle, the riders hand position allows the horse to stretch through their neck, back and body, giving the horse the freedom of movement they require, while still maintaining a light contact through the rein. The riders lower leg needs to stay securely wrapped around the horse to help maintain balance when in the fold or jumping position. The riders position needs to fold straight so that they can still look ahead through the horses ears and on to the next fence, any deviation of the riders position by going off to the side or twisting of the position will unbalance not only the horse but ultimately the rider as well.
5) Landing
The horse now starts to stretch out and extend their front legs ready for landing. Depending on the cater lead that is required, the horse will land with one foreleg landing first then quickly followed by the other foreleg, and the hindquarters following through from behind. The rider will start by bringing their upper body back up into a upright position, while still allowing their hands to remain in contact through the rein to the bit in the horses mouth, but without interfering with the horses balance and movement, this is especially important as horses use their necks for most of their balance. The riders lower leg should remain in position, still on the girth area of the horse, with the rider looking ahead to the next fence.
6) Get Away
The horse is now moving away from the jump and on to the next. The rider needs to make sure that the horse is in balance with plenty of energy and impulsion still being generated and that the horse is on the correct canter lead to enable it to turn in balance to the next fence. The rider should check that their position is still accurate, with reins the correct length, and lower leg secure and with the upper body sitting tall and the rider focussed on the next jump.
7) Turn
This is where the rider turns away from one fence and on to the other, and the seven stages start all over again.
![]()
Equestrian and Horse • The Equestrian • The Horse 'Equus' • Equestrian News • Horse Tack • Horse Care
Equestrian Clothing • Horse Riding • Horse Worming • Horse Training • Horse Bits • Riding Holidays
Horse Shows • Horse Videos • Riders • Equine Art • Books • Directory • Site Map • Contact Us
© 2012 Equestrian and Horse